1. Analysis status
Once we get the model with the issue, we click on the calculate button. The first thing to review is the analysis status and the software version.
After clicking on the calculate button, you can see the analysis status at the top left side of the modeling window. From there, you get the first insight into what is happening in the model, such as utilization ratios, analysis errors, singularities, percentage of the applied forces, etc. I will explain these later during the checklist points.

Also, we always ask the user what software version they use because sometimes upgrading the software will help solve the issue. To see the software's version, click on the information icon. There, you can see the exact version. If you click on the update button, that will lead you to the download page, where you can see the latest version and download the latest if you are not in that one. Test it to see if your problem is solved in that new version.

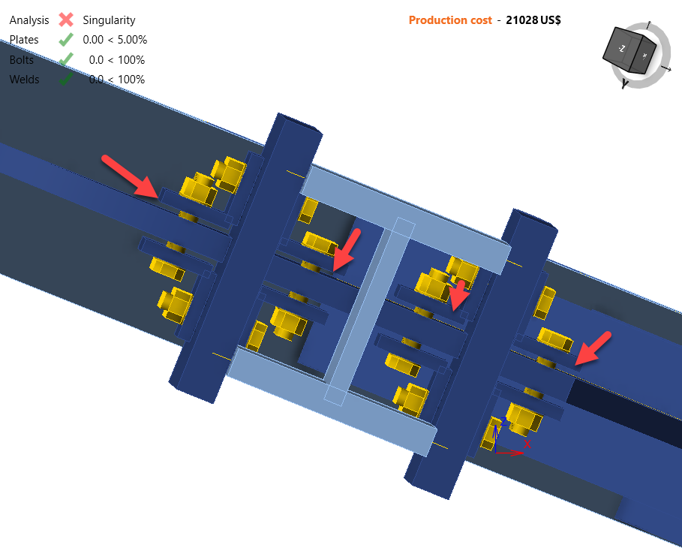
2. Singularities
When you see the word singularity on the top left side of the modeling window, do not panic! The best thing to do is go to the Check tab for more information. So, what is a singularity? This happens when the mesh is created, but the analysis can’t start because one of the elements is not connected to the joint or there is a gap or overlapping of connecting items, and I can keep going with the situations that create a singularity; I won’t go through all of them as the objective of this guide is to tell you where to find more information and how to fix it.
When you are in the Check tab, see that the analysis tab has info about where the singularity is happening, in this case, M3. Also, if you activate the deformed shape when you get a singularity, you can see what plate or member is creating the singularity.

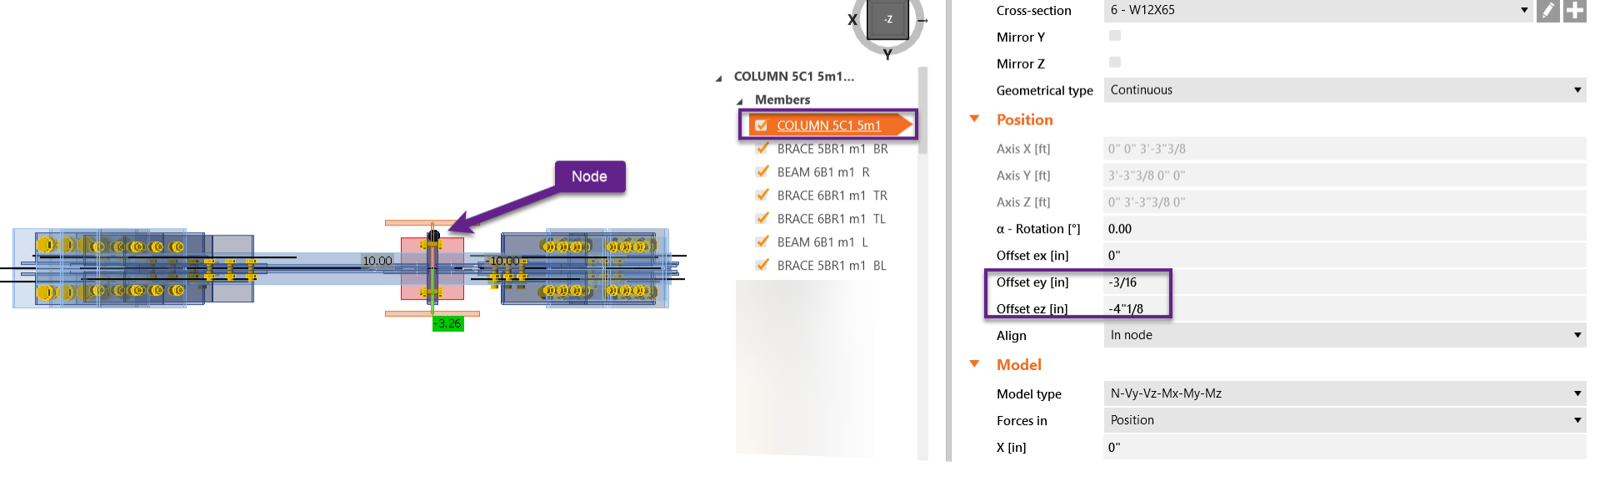
3. Modeling tab - member boundary conditions
If the singularity is not that obvious, then go back to the modeling tab and review every member in the model: